Imagine transforming any space into a cinema, a presentation hub, or a gaming arena in minutes. That’s the promise of portable projector screens. Gone are the days when setting up a big screen meant complex installations or finding a perfectly blank wall. Today, these versatile screens offer instant deployment, allowing you to enjoy large-format visuals wherever you are, whenever you want.
Whether you’re planning an epic outdoor movie night under the stars, delivering a crucial business presentation in an unfamiliar venue, or simply want to take your gaming experience to a massive scale in a friend’s living room, a high-quality portable projector screen is an absolute game-changer. This comprehensive guide will delve into everything you need to know about these incredibly convenient devices, from understanding their core features to exploring the different types available and, crucially, how to pick the best one for your specific needs. We’ll focus on what makes a screen truly “instant setup” and how you can achieve a fantastic viewing experience without the fuss.
Why Go Portable? The Undeniable Appeal of On-the-Go Projection
The shift towards portable technology has revolutionised how we consume media and conduct business. Portable projector screens are a prime example of this evolution, offering a flexibility that traditional fixed installations simply can’t match. Their appeal lies in their versatility and convenience, allowing you to create an immersive visual experience almost anywhere.

One of the most significant benefits is flexibility. Unlike a permanently mounted screen or a painted wall, a portable screen isn’t tied to a single location. You can move it from your living room to the garden, take it to a friend’s house, or even pack it for a camping trip. This adaptability means your entertainment or presentation setup can truly go wherever you do. It also offers a space-saving solution for those who don’t have the room for a dedicated home cinema or a large, permanent screen. When not in use, most portable screens pack down into a compact size, easily stored in a cupboard or under a bed, freeing up valuable living space.
Consider the diverse use cases where a portable screen shines. For outdoor cinema, an inflatable screen can transform your garden into a magical movie theatre, perfect for summer evenings with family and friends. For business professionals, a compact pull-up or tabletop screen ensures you’re always prepared to deliver impactful presentations in various client offices or conference rooms, without relying on potentially inadequate venue equipment. Gamers can take their console or PC setup to a whole new level, projecting their favourite titles onto a massive screen for an incredibly immersive experience, whether at home or at a LAN party. Even for camping trips or pop-up events, these screens provide an easy way to share content, from holiday photos to promotional videos, without needing a dedicated setup. The ability to create a large display on demand, without the need for complex tools or professional installation, is what makes portable screens so appealing.
Understanding the Core: Key Features of Portable Projector Screens
Before diving into the different types of portable screens, it’s essential to understand the fundamental features that dictate their performance and suitability for various applications. These technical specifications might seem daunting at first, but they’re crucial for making an informed decision.
Screen Material and Gain: The Canvas for Your Image
The surface of your projector screen isn’t just a simple piece of fabric; it’s a carefully engineered material designed to optimise image quality. The choice of screen material significantly impacts how your projected image looks, affecting brightness, colour accuracy, and viewing angles.

Most portable screens use a matte white material. This is the most common and versatile choice because it provides a uniform distribution of light, meaning the image brightness appears consistent across the entire screen and from a wide range of viewing angles. Matte white screens are excellent for environments where you can control ambient light, as they don’t significantly boost brightness but offer true-to-life colour reproduction. They typically have a screen gain of 1.0, which means they reflect light equally in all directions, similar to a white wall.
Some screens might feature a grey material. These screens are designed to improve black levels and contrast, especially in rooms with some ambient light. The darker surface absorbs more stray light, making blacks appear deeper and colours more vibrant. However, they also reduce the overall brightness of the projected image, so they’re best paired with brighter projectors. Grey screens usually have a gain of less than 1.0, meaning they reflect less light than a matte white screen.
For specific applications, you might encounter rear projection screens. These materials are translucent, allowing the projector to be placed behind the screen, projecting through it. This setup is often used in events where space in front of the screen is limited or to protect the projector from the audience.
Now, let’s talk about screen gain in more detail. Gain is a measurement of a screen’s reflectivity, specifically how much light it reflects compared to a standard matte white surface (which has a gain of 1.0). A screen with a gain of 1.5, for example, will reflect 1.5 times more light than a 1.0 gain screen, making the image appear brighter. However, higher gain often comes with a trade-off: a narrower viewing angle. This means that viewers sitting off to the side might experience a dimmer image or even a “hot spot” – a brighter area in the centre of the screen – because the light is more focused towards the centre. For portable screens, a gain of 1.0 to 1.2 is generally ideal, offering a good balance of brightness and wide viewing angles, suitable for various audience sizes and setups.
Finally, the importance of black backing cannot be overstated, especially for portable screens. Many quality portable screens feature a black, opaque layer on the back of the viewing surface. This backing prevents light from bleeding through the screen, which can happen if the screen material is too thin or if there’s a light source behind it. It also helps to absorb any stray light from the projector that might pass through the screen, ensuring that the colours and contrast on the front are as accurate and vibrant as possible. Without a black backing, your image can appear washed out or suffer from reduced contrast.
Aspect Ratios: Finding Your Perfect Picture Format
The aspect ratio refers to the proportional relationship between the width and height of your screen. It’s a critical factor because it dictates the shape of the image your projector will display and how well it matches your content. Using a screen with the wrong aspect ratio can result in black bars (letterboxing or pillarboxing) around your image, or a stretched/cropped picture.

The most common aspect ratio for modern content, especially movies and TV shows, is 16:9. This widescreen format is standard for HDTVs, Blu-ray discs, and most streaming services. If you’re primarily using your portable screen for home cinema or gaming, a 16:9 screen is likely your best bet, as it will perfectly match the output of most projectors and media players.
Another common ratio, particularly for older content, computer monitors, and many business presentations, is 4:3. This is a more square format, often referred to as “standard definition” or “full screen.” While less prevalent for entertainment now, if you’re using your portable screen primarily for older presentations or specific legacy content, a 4:3 screen might be more appropriate.
Less common, but sometimes found in dedicated home cinema setups, is the 2.35:1 (or 2.40:1) aspect ratio, also known as “Cinemascope” or “Anamorphic.” This ultra-widescreen format is designed to perfectly fit the aspect ratio of many Hollywood blockbusters, eliminating the black bars at the top and bottom that you’d see on a 16:9 screen. However, projectors capable of native 2.35:1 output are less common and more expensive, and most portable screens don’t offer this ratio.
The key is to match your screen to your projector and content. If your projector’s native resolution is 1920×1080 (Full HD) or 3840×2160 (4K UHD), it’s designed for a 16:9 aspect ratio. If it’s an older XGA (1024×768) or SVGA (800×600) projector, it will likely have a native 4:3 aspect ratio. While most projectors can adjust to display different aspect ratios (e.g., a 16:9 projector can display 4:3 content with pillarboxing), having a screen that matches your primary content source will provide the most immersive and visually appealing experience without wasted screen space.
Screen Size: How Big is Too Big (or Too Small)?
Choosing the right screen size is a crucial decision, directly impacting the viewing experience. While the temptation might be to go for the biggest screen possible, several factors should influence your choice, ensuring it’s practical for your portable needs and suitable for your viewing environment.
The most important factor is viewing distance. There’s an optimal range for comfortable viewing. If the screen is too large for your viewing distance, you’ll find yourself constantly moving your eyes to take in the entire image, which can be fatiguing. Conversely, if it’s too small, the immersive effect is lost, and details might be hard to discern. A general rule of thumb for home cinema is that the viewing distance should be approximately 1.5 to 2 times the diagonal screen size for 1080p content, and closer for 4K content. For presentations, you need to ensure everyone in the audience can clearly read the text, so consider the furthest viewer.
Audience size also plays a role. A small tabletop screen might be perfect for a one-on-one presentation or personal viewing, but it won’t suffice for a large group. For outdoor movie nights or larger gatherings, you’ll need a significantly larger screen, perhaps 120 inches or more, to ensure everyone has a good view.
Finally, and critically for portable screens, portability needs must be considered. A massive 150-inch inflatable screen is fantastic for a garden party, but it’s not something you can easily carry on a train or fit into a small car boot. Larger screens, especially those with rigid frames, will be heavier and have a larger packed size. Common sizes for portable screens range from compact 40-inch tabletop models to substantial 150-inch or even 200-inch inflatable options. Popular sizes for general use include 80-inch, 100-inch, and 120-inch diagonal measurements, offering a good balance between immersion and portability. Always check the packed dimensions and weight of the screen before purchasing to ensure it fits your transport and storage requirements.
Portability Factors: Weight, Pack Size, and Setup Speed
When we talk about “portable” projector screens, these three factors are paramount. A screen might be technically movable, but if it’s heavy, bulky, and takes an hour to set up, it defeats the purpose of instant deployment.
Weight is a primary concern. If you’re frequently transporting your screen, perhaps for business trips or camping, every kilogram counts. Screens made with lightweight aluminium frames or fabric-only designs will be significantly easier to carry than those with heavy steel components or integrated cases. Manufacturers often specify the “net weight” of the screen, which is crucial for determining its true portability.
The pack size refers to the dimensions of the screen when it’s fully collapsed and packed into its carrying bag or case. A screen that’s easy to carry might still be too long or too wide to fit into your car, through doorways, or into overhead compartments on public transport. Look for screens that fold down into a compact, manageable shape, ideally with a dedicated carry bag that has comfortable handles or a shoulder strap.
Finally, and central to this guide, is setup speed. This is where “instant setup” truly comes into play. The best portable screens are designed for rapid deployment, often featuring quick-fold mechanisms or self-contained designs that minimise assembly time. This means fewer poles to connect, fewer screws to tighten, and more intuitive locking mechanisms. A screen that can be set up by one person in under five minutes is considered excellent for instant deployment. Some designs, like pull-up screens, are almost instantaneous, requiring little more than opening a case and pulling the screen up. Others, like inflatable screens, rely on an electric blower for rapid inflation. Always consider how quickly and easily you can get the screen ready for use, especially if you’ll be setting it up frequently or in time-sensitive situations.
The 6 Types of Portable Projector Screens: A Deep Dive into Instant Setup Designs
The market offers a variety of portable projector screen designs, each with its own advantages and ideal use cases. Understanding these different types will help you choose the one that best suits your specific needs for quick setup and performance.
1) Tripod Projector Screens: The Classic Go-To
The tripod projector screen is perhaps the most recognisable type of portable screen, a staple in classrooms, meeting rooms, and community halls for decades. It consists of a screen housed in a casing, which is then attached to a sturdy, extendable tripod stand.

Projector Screen with Tripod, Portable Projector Screen 100 Inches, 16:9, 4K HD Projection Screen, Lightweight and Compact, Carry, Ideal for Home Cinema,…

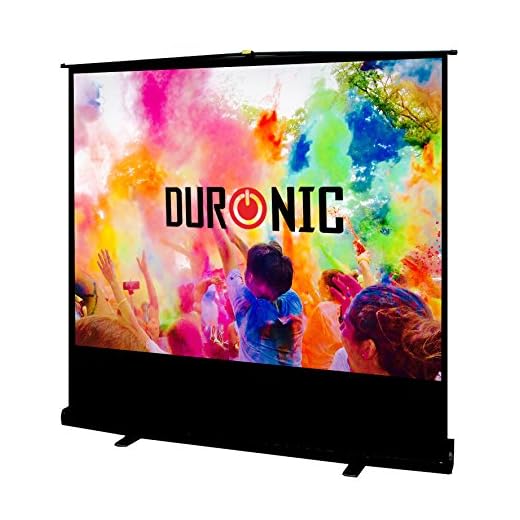
Duronic Tripod Projector Screen TPS50/43 50 Inch Standing Portable Movie Video Projection Screens 4:3 for School Office Home Cinema Theatre with Stand
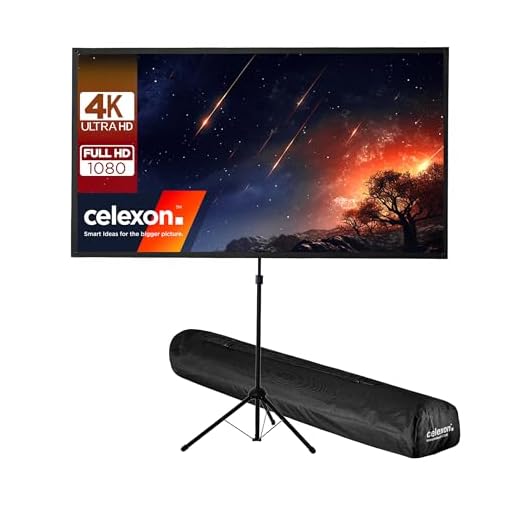
celexon Ultralightweight Tripod screen 90" | 199×112 cm 16:9 | Lightweight & small, portable 4K, Full HD projection solution for mobile home cinema & outdoor…
The screen material is typically rolled up inside a metal or plastic casing. When deployed, the screen is manually pulled up from this casing and hooked onto a support arm that extends from the top of the tripod. The tripod itself provides a stable base, usually with three adjustable legs.
Pros:
Cons:
Setup Process:
- Unfold the tripod legs until they are fully extended and locked.
- Extend the central pole of the tripod to your desired height.
- Unlock the screen casing (if applicable) and gently pull the screen material upwards.
- Hook the top bar of the screen onto the support arm extending from the tripod pole.
- Adjust the screen’s tilt if needed.
Ideal Use Cases: Tripod screens are excellent for classroom presentations, small-to-medium sized business meetings, temporary home cinema setups, and community events where a reliable, adjustable, and relatively inexpensive portable solution is needed. They are a solid all-rounder for general-purpose projection.
2) Pull-Up (Floor-Rising) Projector Screens: Sleek and Self-Contained
Pull-up screens, also known as floor-rising screens, are the epitome of instant setup and sleek design. They are self-contained units where the screen material retracts into a durable, often weighted, casing that sits directly on the floor.

These screens feature an integrated spring or pneumatic mechanism that allows the screen to smoothly rise out of its base. The base itself acts as the stand, providing stability. Some models include a small support arm at the back for added rigidity, while others are entirely self-supporting.
Pros:
Cons:
Setup Process:
- Place the screen casing on a flat, stable surface.
- Unlock the latch on the casing.
- If it’s an auto-rising screen, the screen will slowly and smoothly rise into position. If manual, gently pull the screen up until it locks at the desired height.
- (Optional) Extend any rear support arms for added stability.
Ideal Use Cases: Pull-up screens are perfect for executive presentations, pop-up home cinema in a small flat, gaming tournaments, or any situation where speed, minimal footprint, and a professional appearance are paramount. Their instant setup makes them incredibly convenient for frequent use.
3) Inflatable Projector Screens: The Outdoor Cinema Giant
For truly grand outdoor viewing experiences, inflatable projector screens are the go-to choice. These screens use air to create a large, stable frame onto which the projection surface is attached.


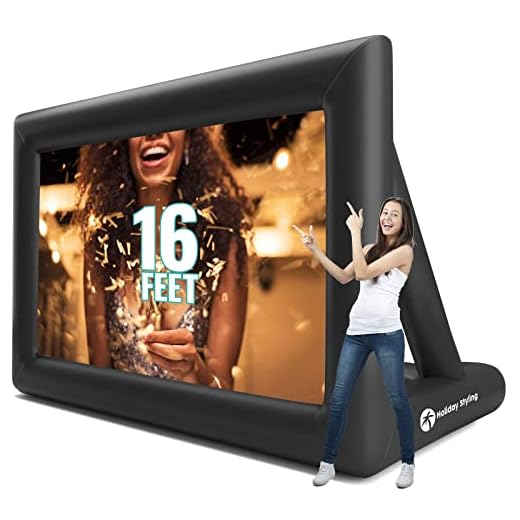
An inflatable screen consists of a large, durable PVC or Oxford fabric frame that is inflated using a continuous-air blower. The projection surface, typically a large white sheet, is then attached to this frame, usually with Velcro or elastic straps, creating a vast, wrinkle-free viewing area.
Pros:
Cons:
Setup Process:
- Unroll the inflatable screen frame on a clear, flat area.
- Attach the continuous-air blower to the inflation port and switch it on. The frame will rapidly inflate.
- Once the frame is fully inflated and rigid, attach the white projection surface to the frame using the provided Velcro or straps.
- Secure the screen to the ground using the included ropes and stakes, especially important for outdoor use.
Ideal Use Cases: Inflatable screens are tailor-made for outdoor movie nights in the garden or park, community events, large sporting event viewings, and drive-in style cinemas. They are designed for situations where a huge, impactful image is desired for a large audience.
4) Fast-Fold (Frame) Projector Screens: Professional Portability
Fast-fold screens, often referred to as frame screens, are the choice for professionals and serious enthusiasts who need a large, perfectly flat viewing surface that can still be transported. They are designed for robust, high-quality projection in various settings.


These screens consist of a rigid, collapsible aluminium frame that snaps together quickly, similar to tent poles but much sturdier. The screen material, typically a high-quality, tensioned fabric, then snaps or clips onto this frame, pulling it taut to create a perfectly flat and wrinkle-free surface.
Pros:
Cons:
Setup Process:
- Lay out the frame components on a clean, flat surface.
- Assemble the frame by snapping the pieces together, ensuring all connections are secure.
- Carefully unfold the screen material and align it with the frame.
- Snap or clip the screen material onto the frame, starting from the corners and working your way around, ensuring even tension.
- Attach the assembled screen to its included legs or stands.
Ideal Use Cases: Fast-fold screens are commonly used for large corporate events, conferences, trade shows, outdoor cinema with a premium feel, and professional presentations where image quality, flatness, and a robust setup are paramount. They are also popular with serious home cinema enthusiasts who want a large, high-quality screen that can be put away when not in use.
5) Tabletop Projector Screens: Small But Mighty
For personal viewing or very small group presentations, tabletop projector screens offer unparalleled portability and convenience.


These are miniature versions of pull-up screens, designed to sit directly on a table or desk. They feature a self-contained casing from which a small screen material is pulled up and locked into place, often with a simple kickstand mechanism at the back for support.
Pros:
Cons:
Setup Process:
- Place the tabletop screen casing on a flat table or desk.
- Open the lid or release the latch.
- Pull the screen material up until it locks into position.
- Extend the kickstand at the back to provide stability.
Ideal Use Cases: Tabletop screens are perfect for impromptu business presentations in small meeting rooms, personal movie watching while travelling, gaming on the go, or sharing photos with a few friends. They are the ultimate solution for highly mobile, small-scale projection needs.
6) Wrinkle-Free Fabric Screens with Adhesives/Hooks: The Ultra-Light Option
For the absolute lightest and most compact portable solution, wrinkle-free fabric screens that attach via adhesives or hooks are an excellent choice.


These are simply a sheet of specially treated, wrinkle-resistant projection fabric. They typically come with grommets (eyelets) around the edges, allowing them to be hung using hooks, nails, or adhesive strips (like Command strips) on any flat wall or surface. Some might even come with a simple rope or bungee cord system.
Pros:
Cons:
Setup Process:
- Unfold the fabric screen.
- Identify suitable attachment points on a flat wall or surface (e.g., hooks, nails, adhesive strips).
- Carefully stretch and attach the screen, ensuring it’s as taut and wrinkle-free as possible.
Ideal Use Cases: These screens are fantastic for backpacking and camping, impromptu backyard movie nights where you can hang it on a fence, dorm rooms, or any situation where ultimate portability and minimal cost are the priority, and you have a suitable surface to hang it from.
Setting Up for Success: Practical Tips for Instant Deployment
Even with the most “instant setup” screen, a few practical tips can ensure your projection experience is smooth, clear, and impactful. Getting the basics right will make a huge difference to your viewing pleasure.
Choosing Your Spot: Location, Location, Location
The environment in which you set up your screen plays a critical role in image quality.
- Flat Surface: Always choose a flat, stable surface for your screen and projector. Uneven ground can lead to a crooked image or an unstable setup, especially for tripod or pull-up screens. For inflatable screens, a clear, level patch of grass or concrete is ideal.
- Avoiding Direct Light: This is perhaps the most important tip. Direct sunlight or strong artificial light sources (like bright lamps or windows) hitting the screen will severely wash out your projected image, making it appear dim and faded. Position your screen in a shaded area outdoors, or in a room where you can control the ambient light by drawing curtains or dimming lights. Even the best screen material can’t magically overcome intense light pollution.
- Viewing Angles: Consider where your audience will be sitting. Position the screen so that all viewers have a clear line of sight and are within the optimal viewing angle of the screen material. As discussed earlier, some screen materials (especially high-gain ones) have narrower viewing angles, so sitting directly in front is best. For wider audiences, a matte white screen (1.0 gain) is generally preferable.
Unpacking and Assembly: A Step-by-Step Guide (General)
While each screen type has its specific setup, a few general principles apply to ensure smooth assembly:
- Read the Instructions: It might sound obvious, but always read the manufacturer’s instructions first. They contain crucial details specific to your model, including proper assembly sequences, locking mechanisms, and care tips.
- Gentle Handling: Screen materials, especially tensioned ones, can be delicate. Handle the screen material gently to avoid creases, fingerprints, or accidental punctures. Avoid dragging the screen across rough surfaces.
- Secure the Screen: Once assembled, ensure all locking mechanisms are engaged and the screen is securely positioned. For outdoor screens, this means properly deploying and anchoring all tie-downs and stakes to prevent it from blowing over in a breeze. For indoor screens, ensure the stand is stable and won’t easily tip.
Projector Placement and Keystone Correction
Once your screen is up, the next step is to position your projector for the best image.
- Optimal Distance: Place your projector at the correct distance from the screen to achieve the desired image size. Most projectors have a “throw ratio” specification that tells you how far away it needs to be for a certain screen size. Many portable projectors have short-throw capabilities, meaning they can project a large image from a relatively short distance.
- Centring the Image: Ideally, the projector should be centred horizontally with the screen. This minimises the need for digital corrections that can degrade image quality.
- Keystone Correction: If your projector isn’t perfectly perpendicular to the screen (e.g., it’s placed on a table below the screen and angled upwards), the image will appear trapezoidal instead of rectangular. This is where keystone correction comes in. Most projectors offer digital keystone correction (vertical and sometimes horizontal) to square up the image. While convenient, excessive keystone correction can slightly reduce image sharpness, as it digitally stretches or compresses parts of the image. Aim to minimise its use by physically aligning the projector as best as you can.
Wind Management (for Outdoor Screens)
Outdoor projection adds the challenge of weather, particularly wind.
- Anchoring is Key: For inflatable and fast-fold screens, proper anchoring is absolutely critical. Use all provided ropes, stakes, and sandbags (if applicable) to secure the screen firmly to the ground. Don’t underestimate the power of a sudden gust of wind.
- Avoid Strong Winds: If strong winds are forecast, it’s generally best to avoid setting up your outdoor screen altogether. Even well-anchored screens can be damaged or become a safety hazard in very high winds.
- Consider Windbreaks: If possible, position your screen in a location that offers some natural windbreaks, such as behind a building or a sturdy fence, to reduce its exposure to gusts.
Beyond the Basics: Advanced Considerations for Your Portable Screen
While instant setup and basic features are important, understanding some more advanced concepts can help you fine-tune your portable projection experience for optimal image quality.

Screen Gain and Ambient Light
We’ve touched on screen gain, but its interaction with ambient light is a crucial detail.
- High Gain (e.g., 1.5+): Screens with higher gain values are designed to reflect more light back towards the viewer, making the image appear brighter. This can be beneficial in environments where you can’t completely eliminate ambient light, such as a living room with some natural light filtering in, or a conference room with overhead lighting. However, the trade-off is a narrower viewing cone. This means that viewers sitting significantly off-axis (to the side) will see a noticeably dimmer image, and you might experience “hot-spotting” – a visibly brighter area in the centre of the screen.
- Low Gain (e.g., 0.8-1.0): These screens, typically matte white or grey, distribute light more evenly across a wider viewing angle. While they don’t boost brightness, they offer superior colour accuracy and uniformity, and are less prone to hot-spotting. They perform best in darkened environments where ambient light is minimal. If you have a very bright projector and can control the light, a lower gain screen will provide a more natural and consistent image for all viewers.
- Controlling Ambient Light: Ultimately, the best way to maximise your projected image quality is to control ambient light as much as possible. Even a high-gain screen can’t compete with direct sunlight. For indoor use, use blackout curtains or dim the lights. For outdoor use, wait until dusk or night-time, or set up in a deeply shaded area.
Viewing Angles and Hot-Spotting
The viewing angle refers to the maximum angle from the centre of the screen at which the image can still be viewed clearly and with acceptable brightness.
- Impact of Gain: As mentioned, higher gain screens tend to have narrower viewing angles. The light is more focused directly forward, meaning brightness drops off more sharply as you move to the sides.
- Minimising Hot-Spotting: Hot-spotting occurs when the centre of the screen appears significantly brighter than the edges, creating an uneven image. This is more common with high-gain screens and can be exacerbated by a projector that’s too bright for the screen or positioned incorrectly. To minimise hot-spotting:
- Choose a screen with a gain closer to 1.0 if you have a wide audience or can control ambient light.
- Ensure your projector is perfectly centred and perpendicular to the screen.
- Avoid excessively bright projectors if you’re using a high-gain screen in a dark room.
For portable setups, where you might have a varied audience or less control over seating arrangements, a screen with a wider viewing angle (typically 1.0-1.1 gain) is often the most practical choice, ensuring a good experience for everyone.
Sound Integration: Completing Your Portable Cinema Experience
A stunning visual display is only half the experience; high-quality sound is essential for true immersion. Most portable projectors have built-in speakers, but these are often small and lack power, especially for outdoor or larger indoor spaces.
- Portable Speakers: The easiest solution is to pair your projector with portable Bluetooth speakers. Look for models with good battery life, decent bass response, and sufficient volume to fill your chosen space. Many modern portable speakers offer surprisingly powerful audio for their size.
- Soundbars: For a more robust audio experience, especially for home cinema setups, a portable soundbar can significantly upgrade your sound. Some soundbars are designed to be compact and easily transportable, offering clearer dialogue and more impactful sound effects than basic projector speakers.
- Wired Connections: While Bluetooth is convenient, a wired connection (e.g., via a 3.5mm audio jack or HDMI ARC if your projector supports it) can provide more reliable audio transmission and potentially better sound quality, avoiding any Bluetooth latency issues.
- Placement: Position your speakers strategically. For a cinematic feel, place them to the left and right of the screen, or use a soundbar directly below the screen, to create a wider soundstage.
Remember, a great picture combined with great sound creates a truly memorable portable cinema or presentation experience.
Top Picks: The Best Portable Projector Screens for Instant Setup
While specific brand recommendations can quickly become outdated, we can highlight the types of screens that excel in different scenarios, embodying the “instant setup” ethos. These examples represent the best approaches to portable projection, focusing on ease of use, performance, and suitability for various applications.
A) Best All-Rounder for Versatility: The Balanced Pull-Up Screen
For those seeking a screen that offers a fantastic balance of quick setup, good image quality, and reasonable portability for a variety of uses, a well-designed pull-up (floor-rising) screen is often the top choice.

Duronic Projector Screen FPS100/43 – 100" Floor Projection Screen | School | Theatre | Cinema | Home Projector Screen (Screen: 203cm(w) X 152cm(h) Portable…
These screens are incredibly convenient, deploying in mere seconds, and their self-contained design protects the screen material while offering a clean aesthetic. Look for models with a sturdy, weighted base for stability and a smooth, reliable pneumatic or spring mechanism that ensures the screen rises evenly and locks securely. A matte white screen material with a gain of 1.0 to 1.1 will provide excellent colour accuracy and wide viewing angles, making it suitable for both movies and presentations in controlled lighting. Their minimal footprint means they fit well in various indoor spaces, from living rooms to small meeting rooms.
B) Top Choice for Outdoor Movie Nights: The Large Inflatable Screen
When the goal is to create a truly memorable outdoor cinematic experience, nothing beats a large inflatable projector screen. These screens deliver impressive scale, transforming your garden or a local park into a grand open-air theatre.
VIVOHOME 20 FT Inflatable Projector Screen for Outside, Blow Up Movie Screen Outdoor Use, Mega Large TV Screen with Carry Bag for Backyard, Tube Leg Support
Opt for a model that includes a powerful, yet reasonably quiet, continuous-air blower for rapid inflation (typically 5-10 minutes for a large screen). Crucially, ensure it comes with robust tie-downs, stakes, and ideally sandbags, to secure it against breezes. While the blower noise is a consideration, the sheer size and impact of an inflatable screen for a large gathering often outweigh this minor drawback. Look for durable, weather-resistant fabric and a screen surface that can handle some ambient light, though best results will always be at dusk or night.
C) Most Compact for Business Travel: The Tabletop or Fabric Screen
For the ultimate in portability, especially for professionals who need to present on the go, a tabletop projector screen or a wrinkle-free fabric screen with adhesive hooks is ideal.
Duronic Projector Screen DPS40/169, Portable 40” Desktop Projection Screen for School Home Theatre, Table-Top projector screen with 16:9 Ratio
- Tabletop screens are self-contained, ultra-compact units that literally set up in seconds on any flat surface. They are perfect for one-on-one meetings, small group collaborations, or personal viewing in a hotel room. Their small size (typically 30-50 inches) is their only limitation, but for true “grab-and-go” convenience, they are unmatched.
- Fabric screens are even lighter and fold down to almost nothing. While they require a flat wall or surface to attach to, they offer incredible versatility for impromptu setups. Look for materials specifically marketed as “wrinkle-free” and consider models that come with strong, reusable adhesive hooks for easy, damage-free mounting. These are excellent for backpackers, campers, or anyone needing a screen that virtually disappears when packed.
D) Premium Pick for Image Quality and Robustness: The Fast-Fold Frame Screen
For those who demand the best possible image flatness and a highly robust, professional setup that can still be packed away, a fast-fold (frame) projector screen is the premium choice.
JWSIT 120" 4K HD Portable Projector Screen with Stand, 16:9 Foldable, Matte White, Front Projection
These screens feature a rigid, collapsible aluminium frame onto which a high-quality, tensioned screen material is securely attached. This tensioning ensures a perfectly flat surface, which is crucial for sharp, undistorted images, especially with high-resolution projectors. While their setup takes a bit more effort than a pull-up screen (and often benefits from two people for larger sizes), the resulting image quality and the screen’s durability are unparalleled in the portable category. They are an investment but pay off in superior performance for large events, professional presentations, or discerning home cinema enthusiasts who need a large, temporary screen.
Maintenance and Care: Keeping Your Screen Pristine
To ensure your portable projector screen continues to deliver excellent image quality and lasts for years, proper maintenance and care are essential. A little attention goes a long way in preserving your investment.
Cleaning Instructions: Gentle Care for Your Viewing Surface
The projection surface is the most critical part of your screen, and it needs to be cleaned carefully to avoid damage or degradation of image quality.
- Dust Removal: For everyday dust, use a soft, dry microfibre cloth to gently wipe the screen. Always wipe in one direction, from top to bottom or side to side, to avoid spreading dust around. A soft brush or a can of compressed air (held at a distance) can also be used for stubborn dust particles.
- Spot Cleaning: For smudges, fingerprints, or light stains, use a mild, non-abrasive soap (like a very diluted dish soap) mixed with distilled water. Dampen a clean, soft microfibre cloth with this solution – do not spray the solution directly onto the screen. Gently wipe the affected area, then immediately follow with a separate, clean cloth dampened with plain distilled water to remove any soap residue. Finally, use a dry microfibre cloth to gently pat the area dry.
- Avoid Harsh Chemicals: Never use abrasive cleaners, solvents, alcohol-based cleaners, or strong detergents. These can damage the screen coating, leading to discolouration, streaks, or a permanent reduction in image quality.
- Test in an Inconspicuous Area: If you’re unsure about a cleaning solution, always test it on a small, inconspicuous area of the screen (e.g., the very edge that might be hidden by the frame) before applying it to the main viewing surface.
Storage Tips: Protecting Your Investment
Proper storage is key to preventing damage and prolonging the life of your screen.
- Dry and Clean: Always ensure the screen material is completely dry and clean before packing it away. Storing a damp screen can lead to mildew, mould, or permanent staining. Any dirt or debris left on the screen can cause abrasions when rolled or folded.
- Flat or Rolled, Not Creased:
- For roll-up or pull-up screens, ensure the screen retracts smoothly and evenly into its casing.
- For tensioned frame screens, carefully detach the material and fold it according to the manufacturer’s instructions, usually in a way that minimises creasing.
- For fabric screens, fold them loosely or roll them if possible, avoiding sharp creases.
- Protected: Store the screen in its original carrying bag or case. This protects it from dust, dirt, scratches, and accidental impacts during transport and storage. Keep it in a cool, dry place, away from direct sunlight, extreme temperatures, and pests.
- Avoid Heavy Objects: Do not place heavy objects on top of the packed screen, as this can cause permanent damage to the frame or screen material.
Avoiding Creases and Damage
- Handle with Care: Always handle the screen material with clean hands and avoid touching the viewing surface unnecessarily.
- Even Tension: When setting up frame screens, ensure the screen material is attached with even tension across the entire frame. Uneven tension can lead to wrinkles or distortions.
- Clear Area: Before setting up or packing away, ensure the area is clear of sharp objects, debris, or anything that could snag or puncture the screen material.
- Professional Packing: When packing away roll-up or pull-up screens, ensure they retract smoothly and are fully seated within their protective casing before latching it closed. Don’t force anything.
By following these simple maintenance and care tips, you can ensure your portable projector screen remains in excellent condition, ready to provide instant, high-quality visuals for all your viewing needs.
Conclusion
Portable projector screens have truly democratised large-format viewing, transforming the way we enjoy movies, deliver presentations, and immerse ourselves in games. The emphasis on instant setup has made these devices incredibly appealing, allowing anyone to create a powerful visual experience almost anywhere, without the hassle of complex installations.
We’ve explored the core features that define a screen’s performance, from the critical role of screen material and gain in shaping your image, to understanding aspect ratios and choosing the right size for your audience. We’ve also delved into the diverse array of portable screen types, from the classic versatility of tripod screens and the sleek, rapid deployment of pull-up models, to the grand scale of inflatable giants for outdoor events, the professional flatness of fast-fold screens, and the ultimate compactness of tabletop and fabric options. Each type offers unique advantages, designed to meet specific needs for speed, portability, and image quality.
Crucially, we’ve covered practical tips for successful deployment, from selecting the ideal location and mastering the setup process to optimising projector placement and managing environmental factors like wind. Finally, we’ve highlighted the importance of proper maintenance and care, ensuring your screen remains pristine and performs flawlessly for years to come.
Ultimately, the best portable projector screen for you will be one that seamlessly integrates into your lifestyle, offering the perfect balance of ease of setup, image performance, and portability for your intended use. Whether you’re a business professional on the go, a family looking to create magical outdoor movie nights, or a gamer seeking unparalleled immersion, there’s an instant-setup portable projector screen out there waiting to transform your viewing experience. Embrace the freedom and versatility these incredible devices offer, and get ready to project your world, anywhere, anytime.
For more information on projector screens and projection technology, why not check out Ooberpad, National Science and Media Museum, or WEMAX?